Covid Cats
AGO's Anne Tanenbaum Gallery School studio instructor Janine Lindgren reflects on how pets have become a great solace to many during this time. Spending time with her own “pandemic pets” - her “covid cats” - Janine observes them more than ever and creates lino cut prints of them enjoying their days.

Photographs by George Farmer and Janine Lindgren
by Janine Lindgren
Janine is a studio instructor with the Anne Tanenbaum Gallery School at the AGO.
For more than three months now, our cats have been wondering when we are going back to work. Being stuck at home, I have gotten to know them better, while being available to open and close doors at their beck and call. During the initial shut down and quarantine due to COVID-19, there was a lot of energy for cleaning, sorting, getting overdue work done, piles of papers to go through, garden to ready, Zoom meetings and so on… As an antidote to the chores I wanted to do something creative. Pets have become a great solace to many during this time, with the term “pandemic pets” or “pandemic puppies” being coined, I was thinking of “COVID cats”. I began observing our cats more; I have wanted to make lino cut prints of them for a long time. So perhaps, this was the time, since that was what we had…time.
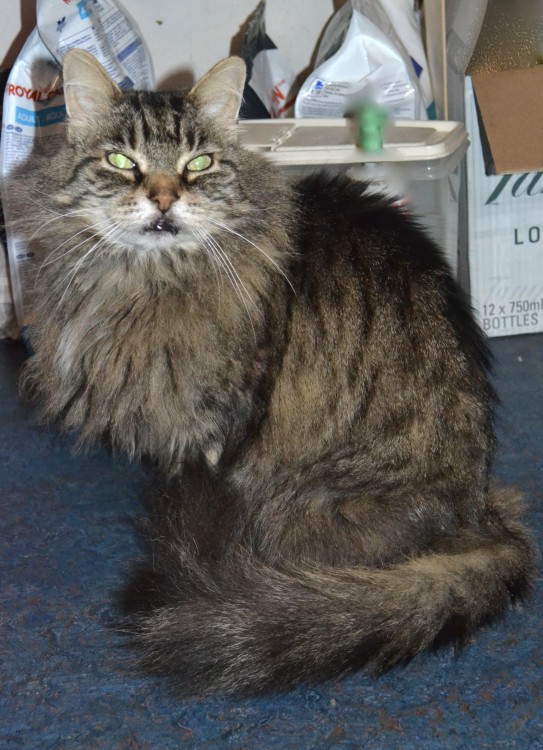
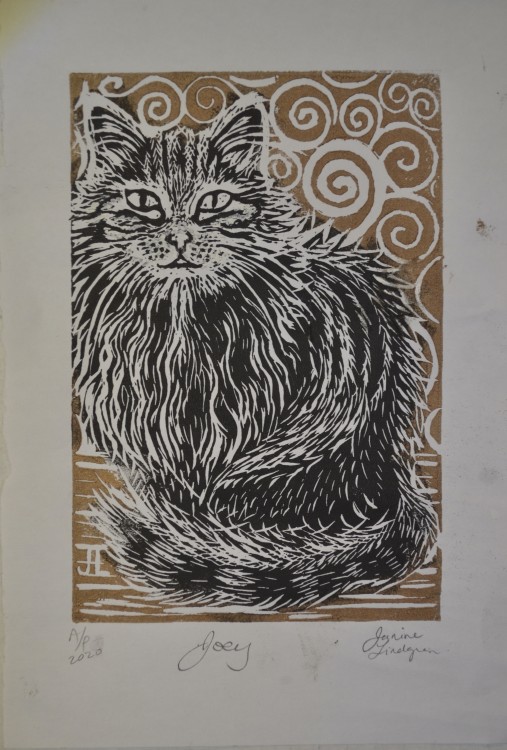
Joey, our friendly Norwegian forest cat, I would find sitting and staring at me with those big eyes. In the garden, on the bed, on either side of a door from which he wants to go through. Here he is sitting and waiting by the cat food, looking at me to fill his bowl.
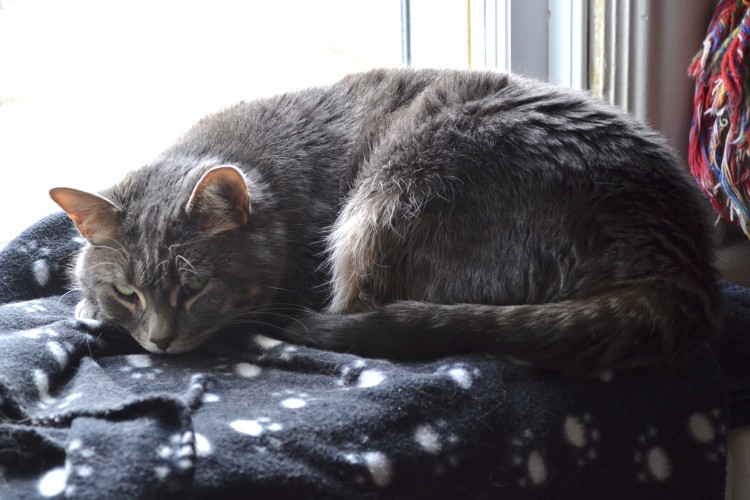
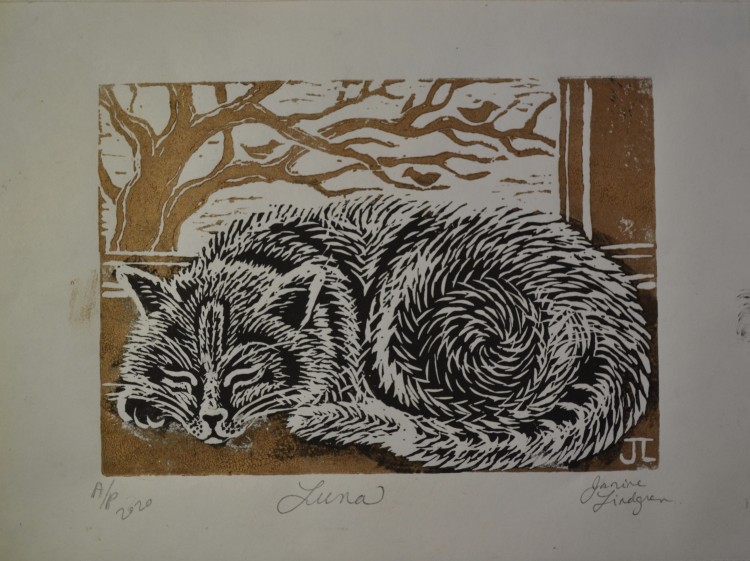
The lovely Luna, frisky, tree-climbing Luna, would tire herself out in the backyard in the morning, her favourite spot to take afternoon naps was in a windowsill, dreaming of birds as they chirp in the tree outside. As I was usually not home during the day, isolation changed this, and I learned to find her there, being warmed by the sun.
Yes, things have been OK, we all had food, shelter, things to do, we were happy with what made the cats happy too.
So I began sketching our cats in situ, then thinking they will move and I will want a reference to work on the print, I took a photo of each of them in their chosen spot. But Luna opened her eyes and caught me taking her photo…they don’t miss a beat!
OK, I should say now, or full disclosure; I am an artist and arts educator; this year is my 30th year working in the education department of the AGO! So I can’t help but include a brief educational component describing the process and techniques of making my cat prints.
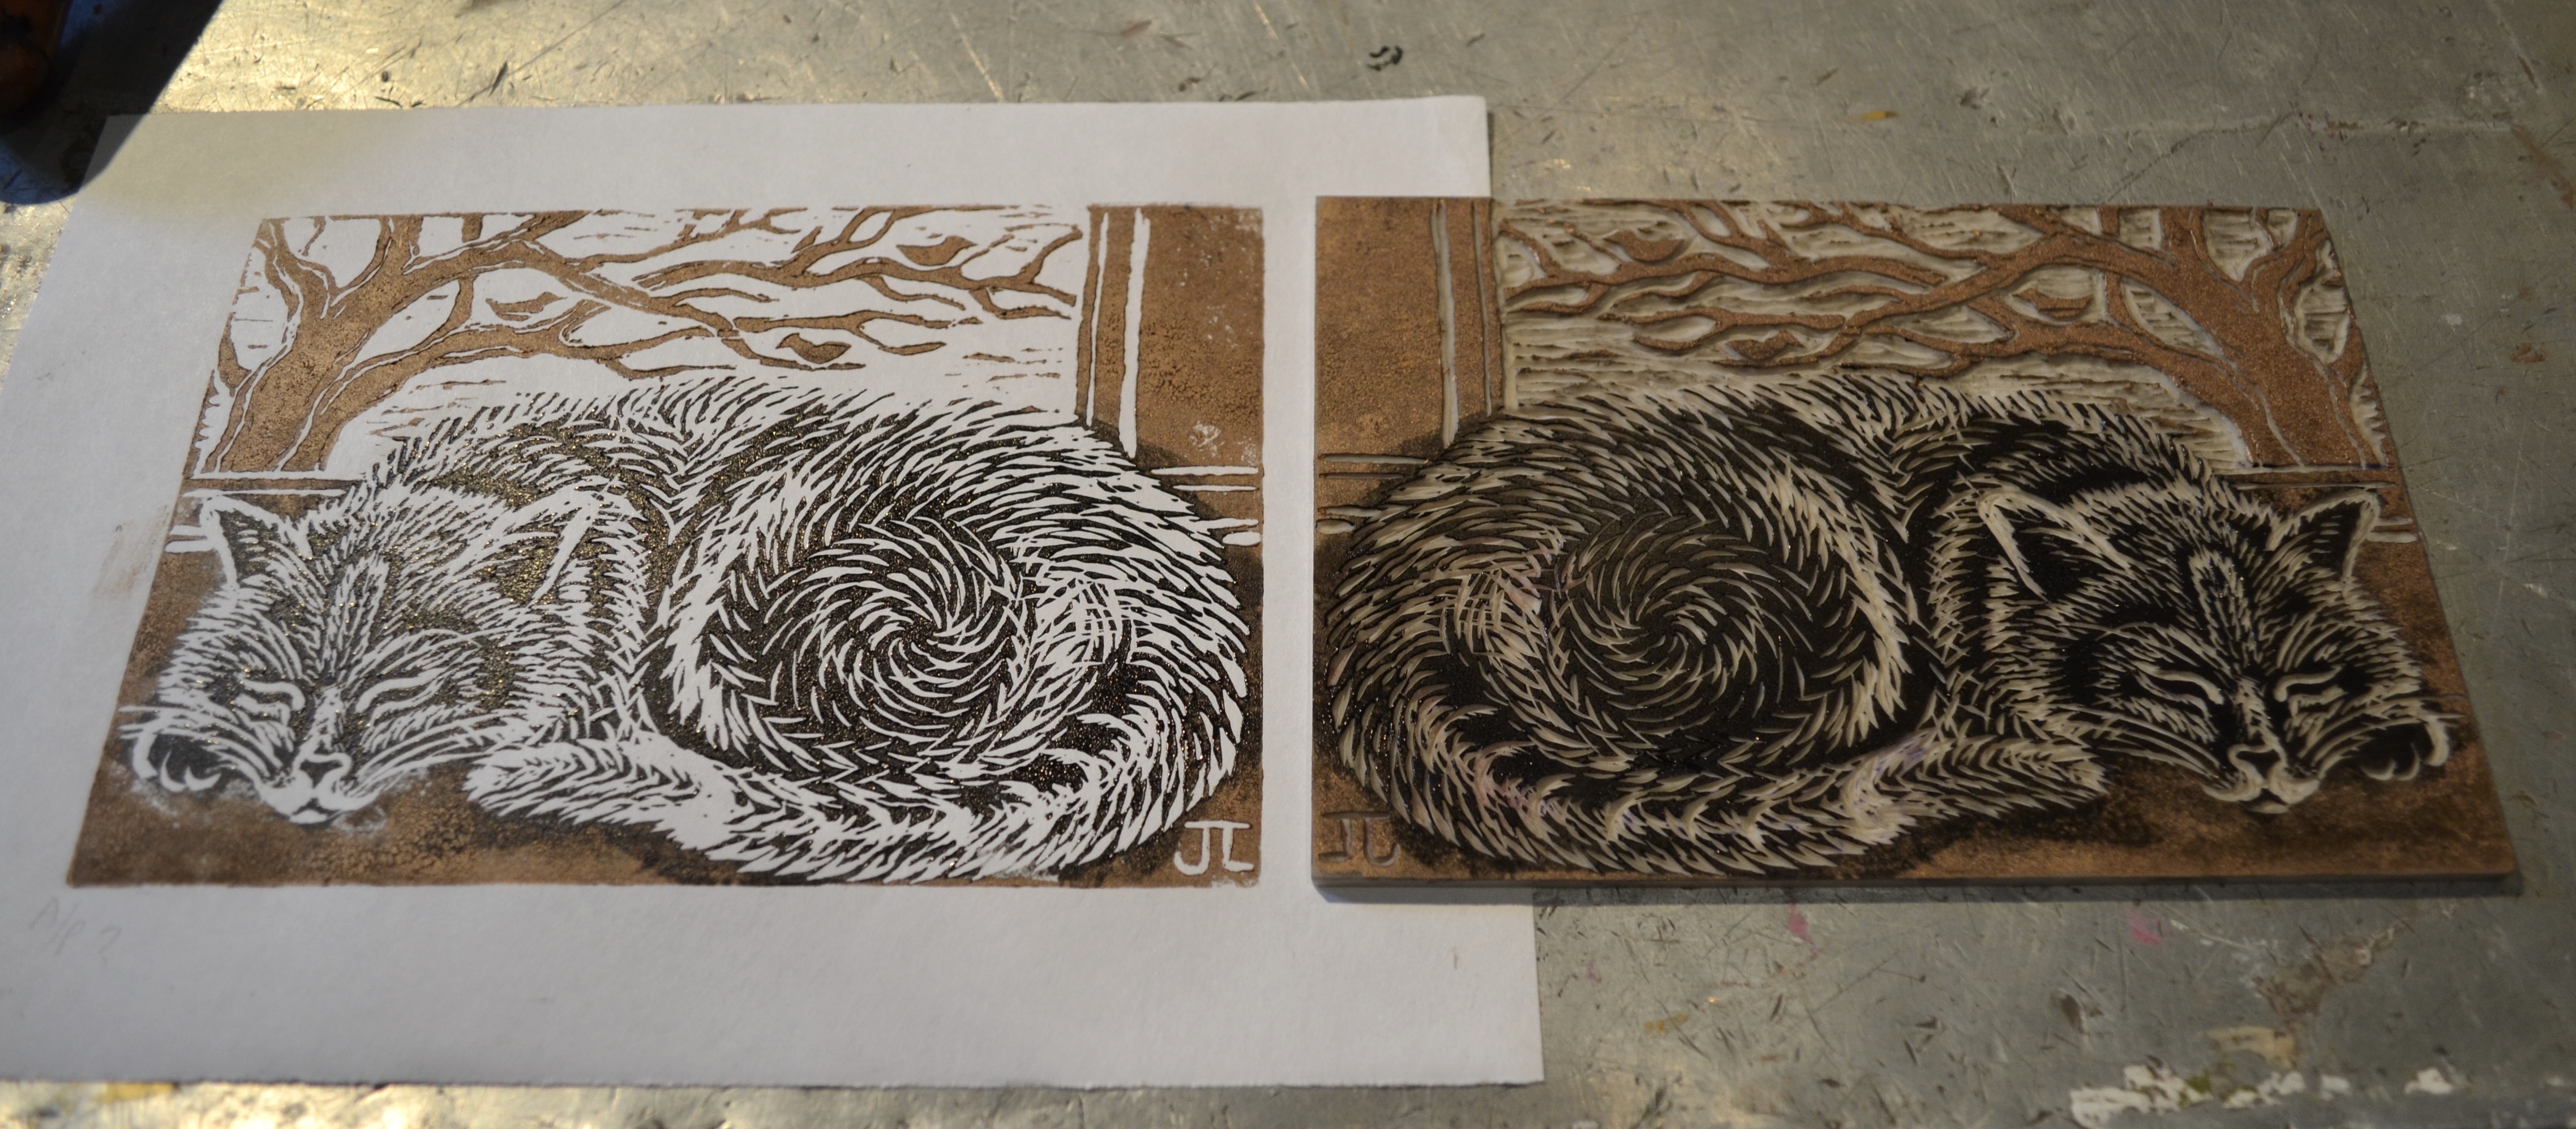
The pencil sketch was transferred to the lino block by placing the drawing face down on the lino, taping it in place, then rubbing the back of the paper hard, so the graphite drawing transfers to the block. Now the image is in reverse on the block from how I originally drew it, but this is OK, for when it is printed onto paper, it will print back to the way I drew it. (Note to remember, plates print mirror image!)
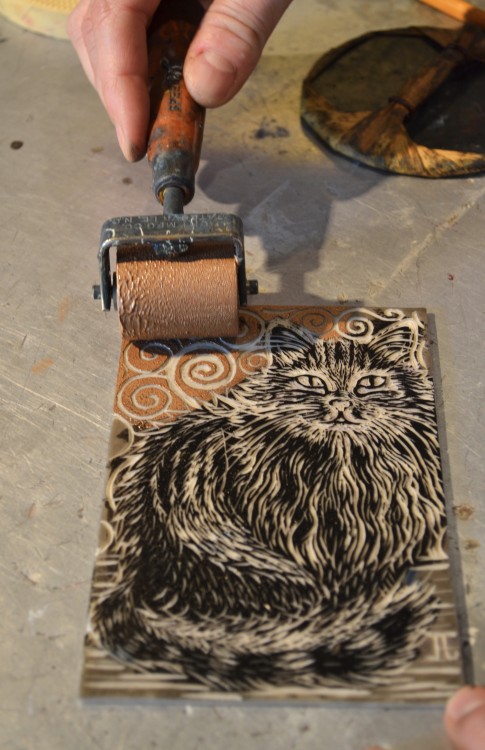
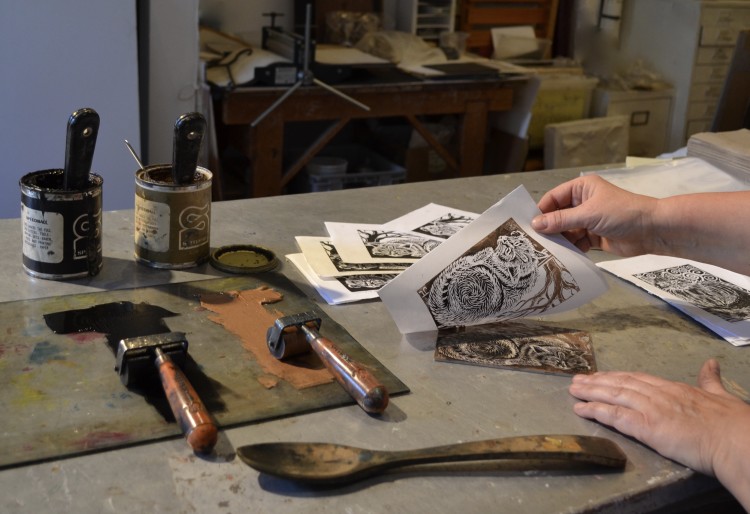
Linoleum block printing is a type of relief print; the block is carved to create two levels, high and low. Also known as positive and negative space, so you have to decide what areas will be black and what will be white. I carve the soft linoleum with sharp metal gouges to remove areas. The lino has no grain (as wood does) so it allows carving in any direction, and is great for curved lines and details. When the block is rolled across with an inked brayer, the high areas take the ink; the low gouged-out areas don’t, and remain white. The image is transferred to paper under pressure using a printing press or rubbing by hand, using tools such as a beran or wooden spoon.
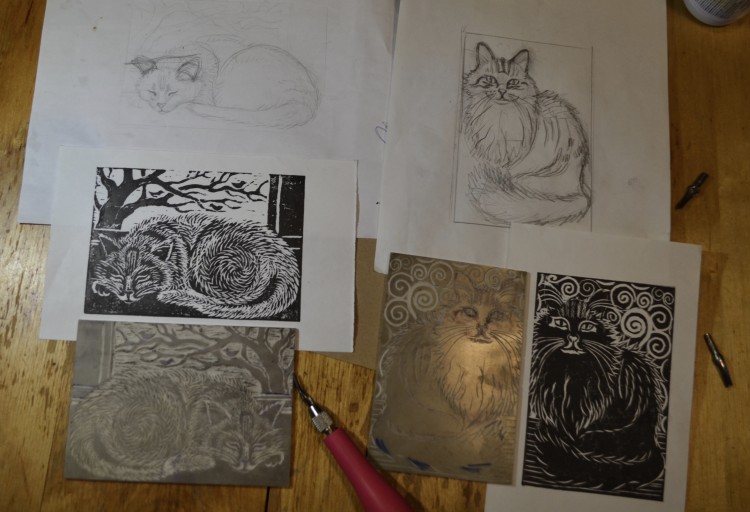
Here is a photo of my sketches, the lino blocks and the first printing proof of my images. Our kitchen table became a multi-purpose working surface.
After the first proof, I can carve some more to enhance texture, clarify shapes, define areas, etc., and print again, I had fun describing Luna’s short fur in swirls of short gouged lines. I carve more curvy lines to describe Joey’s fluffy fur coat. I consider the background and add birds to one and spirals to the other.
First proofs are usually done in black ink on white paper, to help see clearly the contrast and strong graphic composition. Later coloured ink could be introduced. These steps are continued until the artist is happy with the print, which then becomes the artist's proof. At this point there are no more changes made to the block, and it is used to print multiples. As a printmaker, I usually print in editions of anywhere from 10 to 60. You will find numbers on prints indicating edition, the bottom number is total printed and top number identifies the prints in order:10/20 means the tenth print of 20 printed total. Artists may also title the work, sign and date it, under the image, traditionally in pencil.
As of the writing of this article, I have gotten to the artist's proof stage.
As things are opening up again, I have been over to the studio; here is where these photos of me printing and pulling a proof from the block were taken.
I have yet to print the edition, but we have time.

